Open Wordfast Pro 3 and click
![]() .
.
The PM perspective appears.
Click Transcheck.
The Transcheck window appears.
![]()
Click
![]() to browse and select
files from a folder. To add multiple files, press the Ctrl
key and select the files.
to browse and select
files from a folder. To add multiple files, press the Ctrl
key and select the files.
OR
Click ![]() to add an entire folder. Once a folder
is selected, the following message appears.
to add an entire folder. Once a folder
is selected, the following message appears.
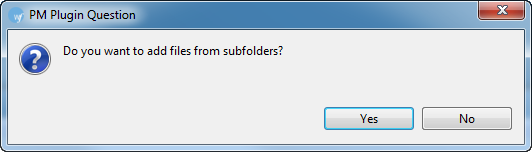
Click
Yes to add files recursively.
This ensures that all files within a folder, including the files
in the sub folders are added.
The files appear. Files are selected by default when added.
![]() Note:
You can check 20 files at a time using Wordfast Pro 3 in Demo mode.
If you want to check more than 20 files, you will need to purchase
the Wordfast Pro 3 license from www.wordfast.com.
Note:
You can check 20 files at a time using Wordfast Pro 3 in Demo mode.
If you want to check more than 20 files, you will need to purchase
the Wordfast Pro 3 license from www.wordfast.com.
Under Segment Changes/Transcheck Report options, select Add Notes column to report to add notes added to the segment in the TXML file.
Select the following Transcheck options, if required. To configure individual Transcheck options, go to Configuring Transcheck.
Select |
to check... |
Partial Check |
the character count between the source and target segments. Go to Edit > Preferences > Translations >Transcheck> Partial or click Configure to enter the minimum and maximum % of allowed character count for the target segment. |
Empty target Check |
for empty target segments. |
Numerical Check |
if the numerals in the source segment match the target segment. The numbers with hyphens will be read as two separate numbers. Click Configure to set the option in Preferences. |
Tag Check |
for missing tags in the target segments. |
Forbidden Characters check |
check if the target segment includes forbidden characters. Go to Edit > Preferences > Translations >Transcheck> Forbidden Characters or click Configure to add the forbidden characters that should not be included in the target segment. |
Punctuations Check |
for consistency in punctuation between source and target segments. Go to Edit > Preferences > Translations >Transcheck> Punctuations or click Configure to add the punctuation marks that should not be included in the target segment |
Untranslatable Check |
if the untranslatable content in source and target segments is consistent. Go to Edit > Preferences > Translations >Transcheck>Untranslatable or click Configure to add untranslatable text that must be retained in the target segment. |
Copied Source Check |
if the source segment has been copied to the target segment. |
Character Limit Check |
if the characters in the segment or paragraph exceeds the maximum number of allowable characters (length). |
First word capitalization Check |
if the first word of each segment is capitalized. |
Edited Exact match Check |
if any exact match segments from the TM have been edited. |
Unedited Fuzzy Match Check |
if any fuzzy match segments from the TM have been left unedited. |
Source Consistency Check |
consistency between source segments if the target is repeated. |
Target Consistency Check |
consistency between target segments if the source is repeated. |
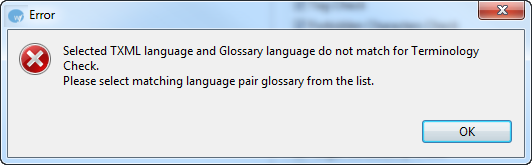
Terminology Check |
if the terms in the source segment are translated correctly based on the glossary. |
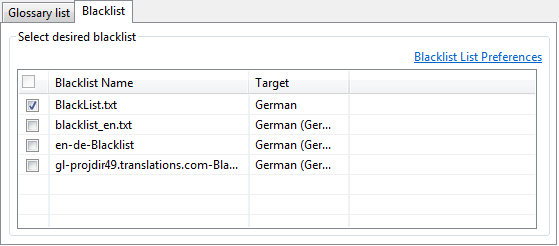
Blacklist check |
if any terms in the translation are blacklisted. |
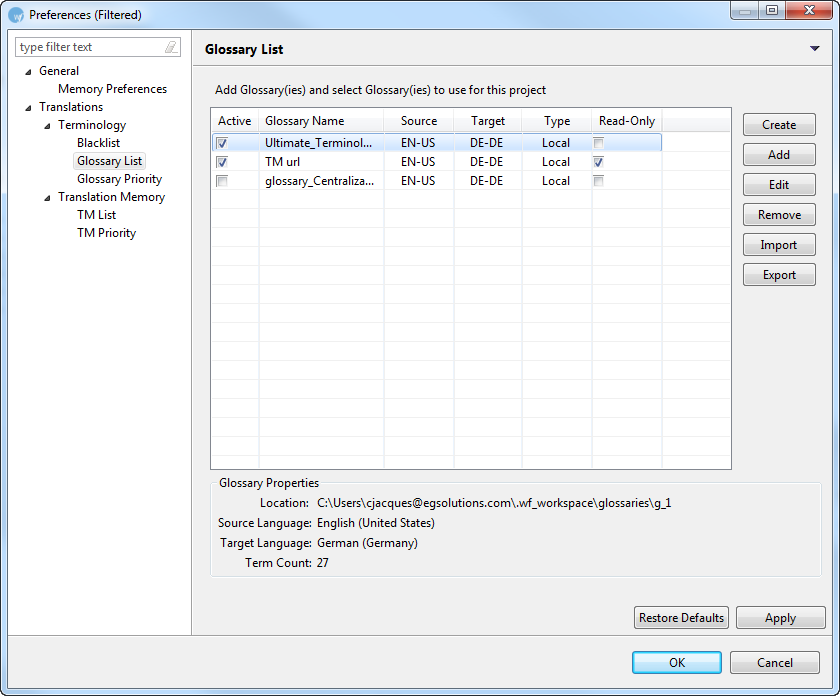
If Terminology Check is enabled, a glossary must be selected. To select a glossary:
Click the Glossary
list tab. Select one or more glossaries from the list of glossaries.
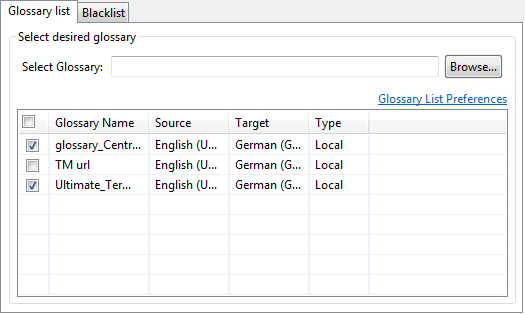
To create or add another glossary,
click Glossary List Preferences
to go to Preferences.